Showing posts with label frontcover. Show all posts

Friday, 15 April 2011

My take on Cosmopolitan's 'everyday sexy' eyes

For those of you that read Cosmo (and that got this month's issue with Kim Kardashian - UK version, just to clarify), you've probably seen this in the magazine. 


I liked the look of this, so I decided to try it out. After trying it a couple of days ago, I thought I'd attempt to do a tutorial of sorts, but not really a tutorial, rather more like my way of doing this. First of all, I decided to do it with lighter browns and tweak a few things, but of course, you can just follow the steps in the magazine. I'll be adding what Cosmo wrote for each step in italics, because it can be a bit tricky to read that tiny writing!

Froncover Mermaid Dreams palette, Natural Collection eyeshadow in Milk Chocolate, Maybelline Colossal Volume mascara, Collection 2000 Big Fake mascara, Shu Uemura eyelash curler, Urban Decay 24/7 Liner in Bourbon

Naked eye
A quick note before I start, my photos seem a bit blurred at some points, which I didn't notice whilst taking these pictures. It's probably due to my camera lens possibly being a bit smudged, so sorry bout that! 

Step One:
"'Sexy = dewy, so avoid matt eyeshadow on the eyelid', says Kay. 'Press a silky brown eyeshadow all over the lid to just above the crease.' Using your fingers helps flatten the powder and make sit more reflective."

For this step, I used my Frontcover Mermaid Dreams palette. So baked eyeshadow isn't the same as silky, I felt like using this palette. To start with, I used Baked Bronze. 


Then I decided it was shimmery enough for me, so I used Sunray over it to give it a bit more oomph.


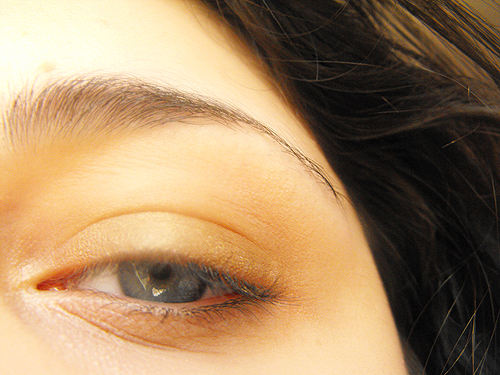
When I was trying to photograph it, it isn't very visible on my eyelid, but I followed the instructions from the magazine, so there isn't that much to miss.
Step Two:
"Using a small, fluffly brush, swirl a dark matt brown eyeshadow where your eye naturally creases. 'Don't take the colour too far inwards - it's all about trying to widen the eye', says Kay.
Again, I didn't really pay attention to the colour choice. I decided to go with a medium brown instead of dark, as dark colours can look really harsh against my colour. I used Natural Collection's Milk Chocolate £1,79, I believe, but you can get 3 for £5 on NC's stuff at Boots at the moment!

 
Step Three:
 "'Brown pencil has the same impact as black but is much more flattering.', says Kay. Run brown eyeliner all along the upper lashline. 'You can apply a little on the lower lashes too if you have almond-shaped eyes, but don't do this if your eyes are very round.' 
Add a few extra dots of pencil on the outer corners to give a thicker edge. 'Finish the line at the last lash, not beyond on the skin,' says Kay."
Another rather simple step, I used my Urban Decay eyeliner in Bourbon.


As with everything else, I toned this down a bit, as although they say it's everyday, I feel their version is a bit more suited to nights, so I made it all a little lighter and subtler.

Step Four:
"For lovely thick lashes, use a finer mascara and apply a few layers, rather than using a thickening formula, which is likely to clump. 'You need to ensure there are no gaps,' says Kay,'so look straight ahead in the mirror and zigzag the mascara from root to tip, holding the wand vertically if you need to.'"
So this step I completely disregarded, as I have my own way of applying mascara to get a not bad result.

I used my Maybelline mascara and my recently-bought Collection 2000 Big Fake one, which everyone and their mum has been raving about.

So the final result....
The final result actually looks nothing like in the magazine, but I quite like it as it's an easy, simple eye makeup that doesn't require liquid eyeliner.


As for the rest of my face, I used Natural Collection's lipstick in Rose Bud (when I first read it I thought it said Rose Dud!) £1.99 and my Sephora cream palette, which I just use for the blush.

I hope you guys like this and if in the future, I do a tutorial, I will try and get some decent eye shots!

Sunday, 20 February 2011

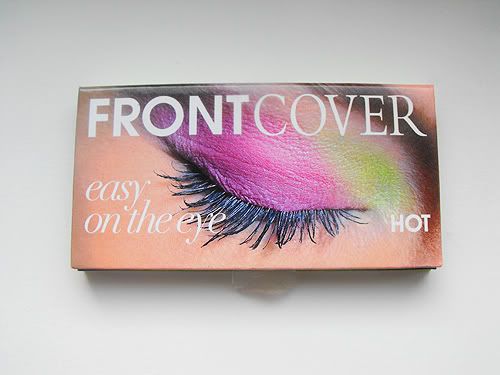
Frontcover easy on the eye HOT

As promised, here's another post! This time it's a palette that I got for Christmas (still have a few things to review that I got actually). Anyway, this here is my first Frontcover product and I've been wanting something of theirs for ages so I was DELIGHTED to have got it as a christmas pressie.

This usually retails for £8.50 in Boots but is currently on offer for £2.12 so if you like the look of this, getting it now would be an absolute bargain!

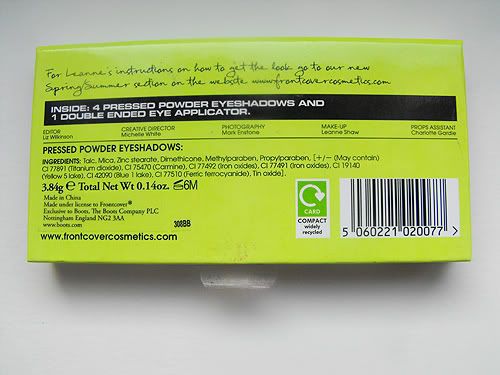
First things first, I love the packaging. It's sturdy and I love the eye makeup which shows how they used the colours and if you don't know how to use the colours, then it's good inspiration. Of course, there is a small detail that I'm not fond of, but I shall talk about it later.

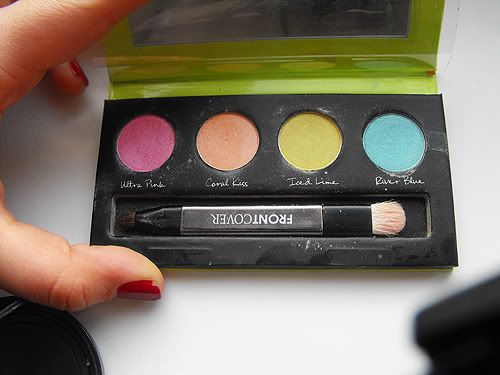
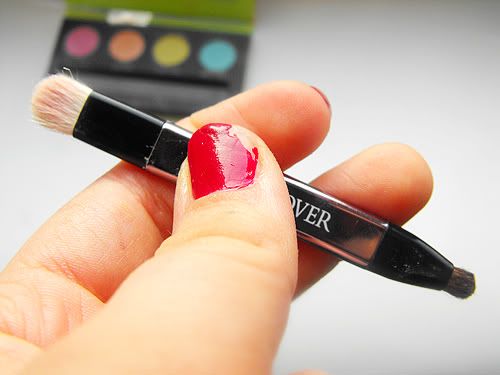
The palette consists of four pastel colours which are ideal for this upcoming spring (that needs to hurry up as I'm getting tired of the snow!) and a double-ended brush that's not actually as bad as the brushes that usually come with palettes. The palette comes with a flap that is designed to protect the colours, I suppose, but as it isn't removable, it's a bit of a nuisance really. But that small detail aside, I'm still really liking the palette!


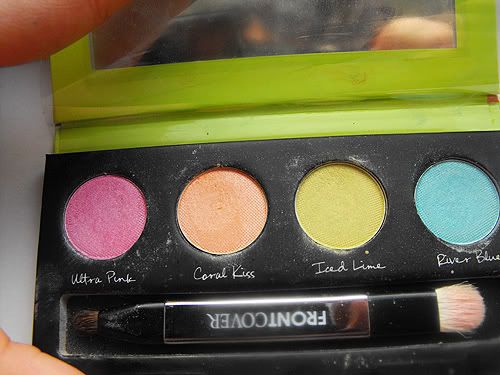
And here we have a closer look at the colours, which are all named and it's a small detail, but I love the font that they've used, it sort of gives the palette a small je ne sais quoi and I'm definitely liking it. The colours are called Ultra Pink, Coral Kiss, Iced Lime and River Blue, of which Coral Kiss and Iced Lime just remind me of summer and spring which is making my longing even greater.

Here's a pic of brush, excuse the chipped nail varnish! So the brushes are quite soft and to a certaint extent, useable, but of course, not as good as my usual brushes.


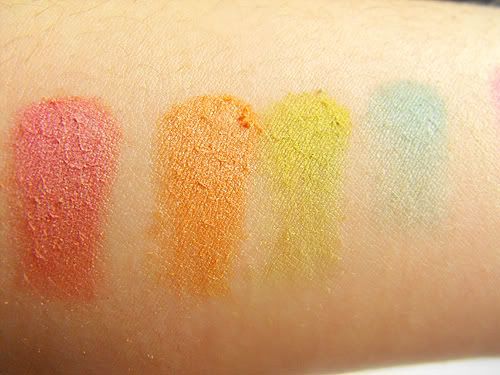
Now for swatches! Here we have some without primer and as you can see, they're quite pigmented and somehow the pink is orangier than it is in real life, probably due to me swatching the orange first, so I guess that shows what a lovely colour you could get if you used both together!


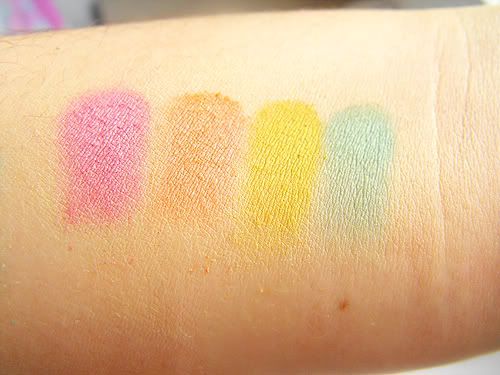
And then finally, with primer. As far as pigmentation goes, there's not much of a difference, just makes it a little more consistent, but it does help it stay longer.

All in all, this is a great palette, especially if you'd go get it at the price that Boots are offering it for and once the sun starts shining more, I'll start using this more often!